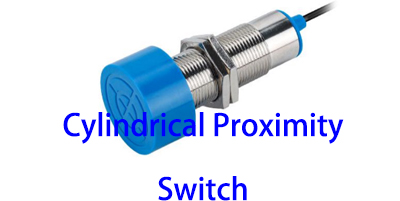
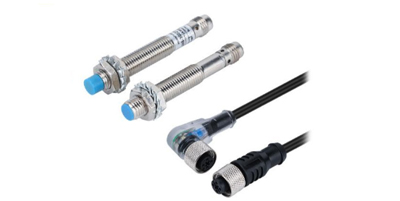
Installing a Plug in Proximity Switch Sensor correctly is crucial for its optimal performance and the seamless operation of the overall system it is integrated into. Whether it's used in industrial automation, robotics, or other applications, a proper installation ensures accurate detection and long - term reliability. Here is a step - by - step guide on how to install it correctly.
⑴Pre - installation Preparation
1.Read the Manual Thoroughly: Before starting the installation, carefully read the user manual provided by the manufacturer. The manual contains vital information such as technical specifications, installation diagrams, and safety precautions. It will help you understand the specific requirements of your particular model of the proximity switch sensor. For example, some sensors may have specific voltage requirements or unique mounting hole patterns.
2.Gather the Necessary Tools: Assemble the tools needed for the installation. This typically includes a screwdriver (flat - head or Phillips, depending on the mounting screws), a wrench if there are nuts to be tightened, and a measuring tape or ruler. You may also need a multimeter to check the electrical connections later.
3.Inspect the Sensor and Components: Visually inspect the Plug in Proximity Switch Sensor and all its accompanying components. Check for any signs of damage during transportation, such as cracks in the housing, bent pins, or loose parts. Make sure all the parts listed in the package are present, including the sensor body, mounting brackets, and any additional accessories.
⑵Installation Steps
1.Select the Installation Location: Choose an appropriate location for the sensor based on its intended use. Consider factors such as the distance to the target object it needs to detect, the presence of any electromagnetic interference sources nearby, and the mechanical stability of the mounting surface. In an industrial conveyor belt application, for instance, the sensor should be placed at a position where it can accurately detect the passing objects without being affected by the vibrations of the conveyor.
Mount the Sensor: If the sensor comes with a mounting bracket, attach the bracket to the selected surface first. Use the appropriate screws or bolts and tighten them securely. Then, insert the Plug in Proximity Switch Sensor into the mounting bracket. Some sensors may have a locking mechanism, such as a snap - on or a screw - down feature, to ensure a firm connection. Make sure the sensor is properly aligned according to the installation diagram in the manual.
2.Make Electrical Connections: Connect the power supply wires to the sensor according to the wiring diagram in the manual. Usually, there will be wires for positive and negative power supply, and in some cases, additional wires for signal output. Ensure that the wire connections are tight and secure. Use wire connectors or terminal blocks if necessary to prevent loose connections, which could lead to intermittent operation or complete failure of the sensor.
⑶Post - installation Checks and Adjustments
1.Electrical Testing: Use a multimeter to check the electrical connections. Measure the voltage at the power input terminals to ensure that the correct voltage is being supplied to the sensor. Also, check the continuity of the signal output wires to confirm that the electrical circuit is complete.
2.Function Testing: Power on the system and test the functionality of the Plug in Proximity Switch Sensor. Bring the target object within the sensor's detection range and observe if the sensor responds correctly. If the sensor has an indicator light, it should change state when the object is detected. If the sensor is connected to a control system, check if the control system receives the correct signal from the sensor.
3.Adjustment: If the sensor does not respond as expected or if the detection range needs to be fine - tuned, make the necessary adjustments. Some sensors may have adjustable sensitivity settings, which can be adjusted using a potentiometer or through software configuration. Also, check the alignment of the sensor again to ensure it is in the optimal position for detection.
Proper installation of a Plug in Proximity Switch Sensor is a combination of careful pre - installation preparation, accurate installation steps, and thorough post - installation checks. By following these steps, you can ensure that the sensor operates effectively and contributes to the smooth operation of the entire system.